Updating access with Tesla
You can use either of the following URLs to prompt users for more Tesla
permissions in the event you need additional access from the
vehicle owner due to:
If one or more of the Smartcar scopes you pass map to a new Tesla permission(s)
for the account, the user will be prompted to update access after they log in
with Tesla.
To prompt users to update their Tesla permissions, use the reauthentication flow. This allows users to grant additional permissions without requiring a new vehicle connection.
    https://connect.smartcar.com/oauth/reauthenticate?
    response_type=vehicle_id
    &make=TESLA
    &application_id=8229df9f-91a0-4ff0-a1ae-a1f38ee24d07
    &scope=read_odometer control_security
| name | type | required | description |
|---|
response_type | string | true | This should be set to vehicle_id. |
make | string | true | Specifies the brand to update access to. Currently, the only make available for this flow is TESLA. |
application_id | string | true | The application’s unique identifier. This is available on the credentials tab of the Smartcar Dashboard. |
scope | [permissions] | true | A space-separated list of permissions that your application is requesting access to. The valid permission names can be found in the permissions section. When reauthenticating, the user will be required to grant the corresponding OEM permissions before being able to exit the flow. |
The reauthentication flow does not redirect the user back to your application or issue new credentials. Your existing application-level access token continues to work for all connected vehicles.
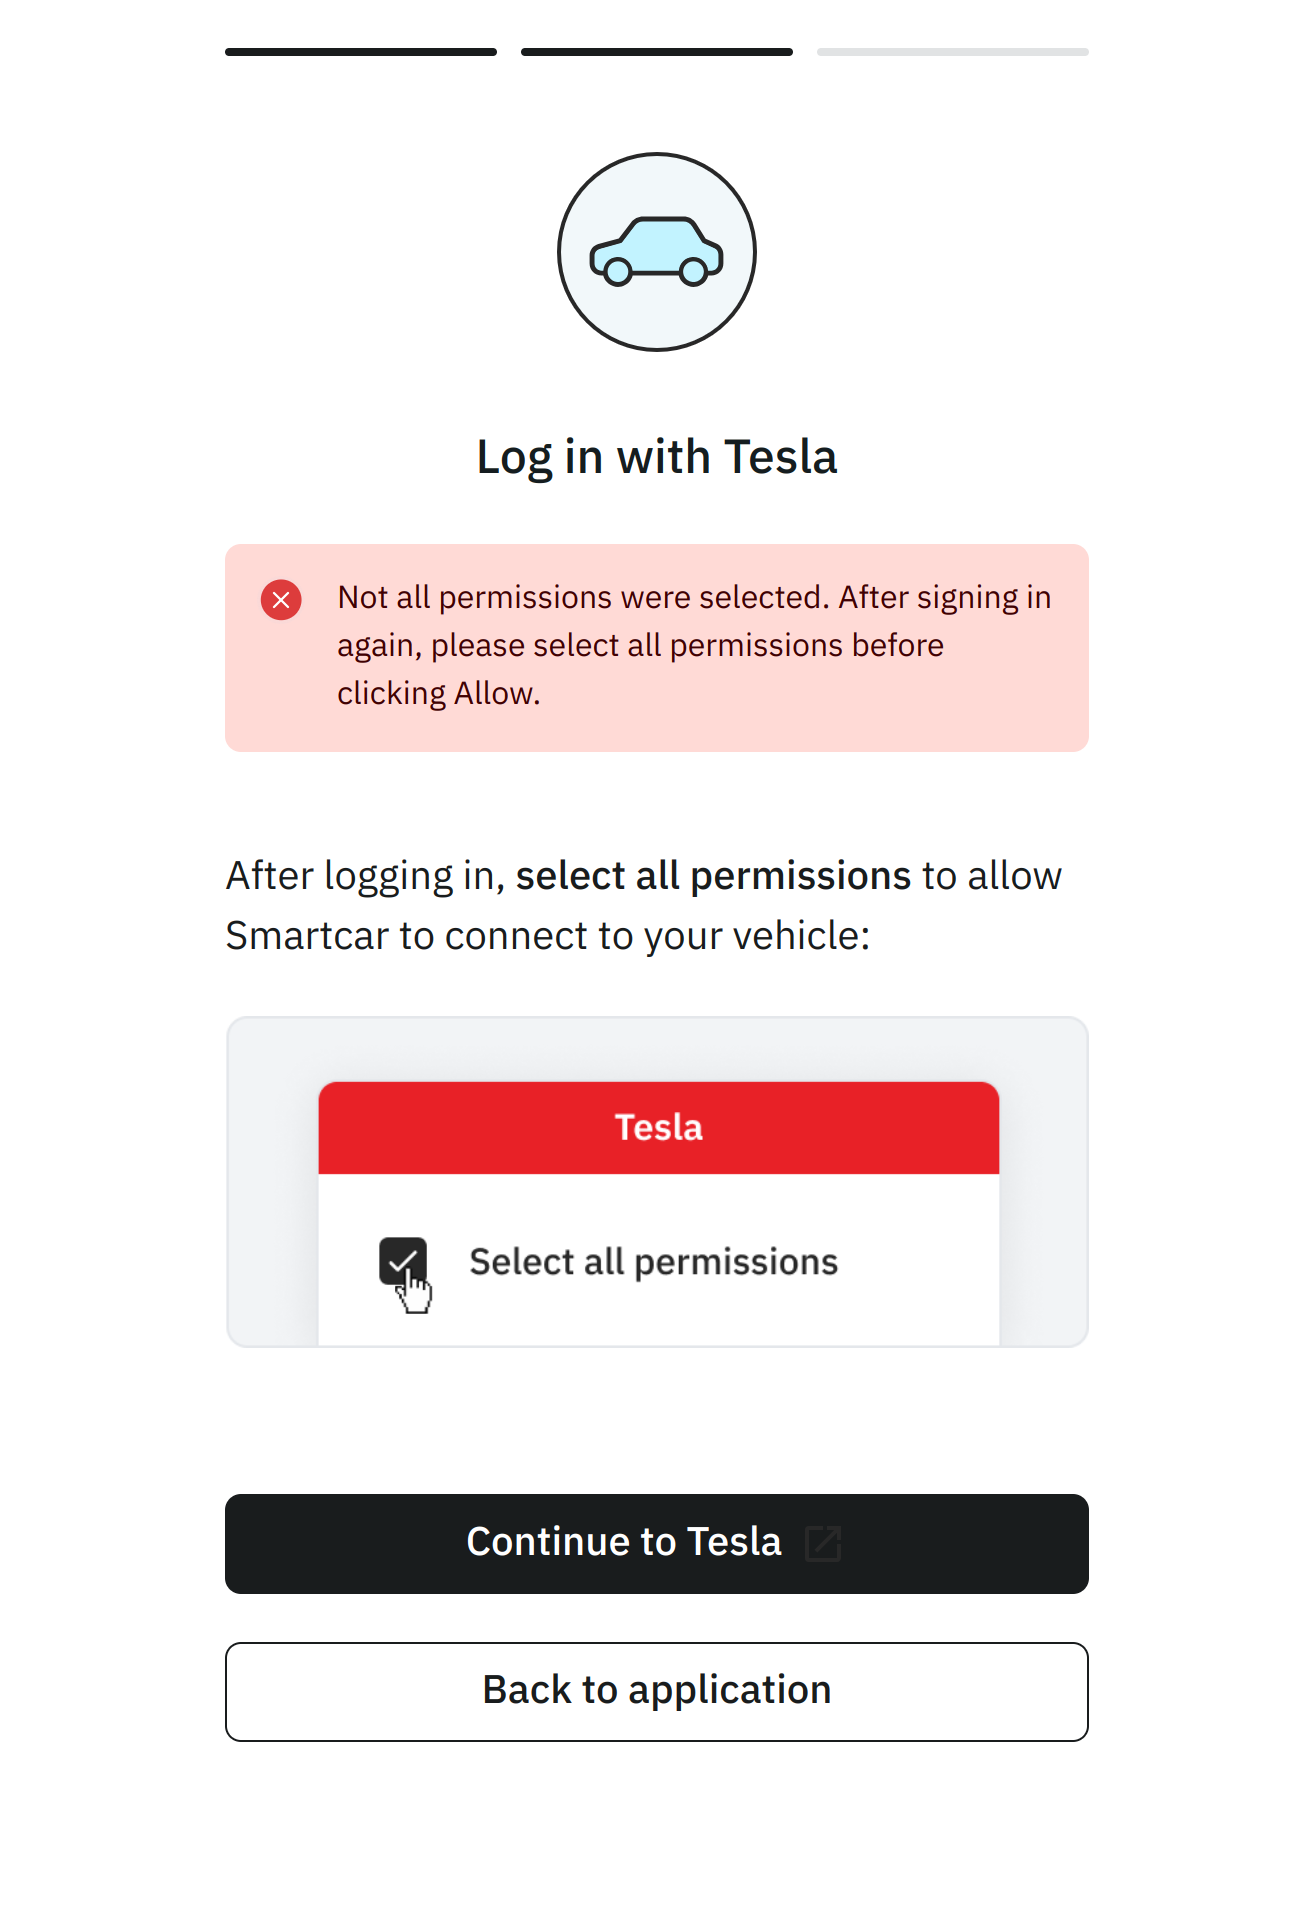
Requiring Tesla Permissions
To ensure users select the necessary permissions with Tesla before
being able to connect their vehicle via Smartcar, please append the required:
prefix to Smartcar scopes in your Connect URL e.g. required:read_location.
As a result if they do not select the necessary permissions with Tesla, they will see the
following screen and be prompted to return to Tesla to update their permissions.
Permission Mappings
Tesla provides a limited set of permissions. To ensure vehicle data is shared only with explicit consent, Smartcar has mapped Tesla’s permissions into its existing more granular options. For example, granting access to “vehicle commands” in a Tesla account allows an application to start or stop charging, lock or unlock doors, enable or disable Sentry Mode, and more. Smartcar separates these permissions so that applications must request access to control charging separately from access to vehicle security, control navigation, etc. Smartcar does not use or share vehicle data beyond the permissions listed in this table. An application with the ability to control the charge status of a vehicle, does not have access to control other aspects of the car unless explictly requested and granted by a vehicle owner.
| Smartcar Permission | Tesla Permission |
|---|
control_charge | Vehicle Charge Management (vehicle_charging_cmds) |
control_climate | Vehicle Commands (vehicle_cmds) |
control_navigation | Vehicle Commands (vehicle_cmds) |
control_pin | Vehicle Commands (vehicle_cmds) |
control_security | Vehicle Commands (vehicle_cmds) |
control_trunk | Vehicle Commands (vehicle_cmds) |
read_battery | Vehicle Information (vehicle_device_data) |
read_charge_records | Vehicle Charge Management (vehicle_charging_cmds) |
read_charge | Vehicle Information (vehicle_device_data) |
read_climate | Vehicle Information (vehicle_device_data) |
read_compass | Vehicle Information (vehicle_device_data) |
read_engine_oil | Vehicle Information (vehicle_device_data) |
read_extended_vehicle_info | Vehicle Information (vehicle_device_data) |
read_fuel | Vehicle Information (vehicle_device_data) |
read_location | Vehicle Location (vehicle_location) |
read_odometer | Vehicle Information (vehicle_device_data) |
read_security | Vehicle Information (vehicle_device_data) |
read_speedometer | Vehicle Information (vehicle_device_data) |
read_thermometer | Vehicle Information (vehicle_device_data) |
read_tires | Vehicle Information (vehicle_device_data) |
read_user_profile | Profile Information (user_data) |
read_vehicle_info | Vehicle Information (vehicle_device_data) |
read_vin | Vehicle Information (vehicle_device_data) |