Prerequisites
For this tutorial it is recommended to have the following in place:- To receive webhooks you’ll need to set up a callback URI on your server.
- To subscribe a vehicle you’ll want to have Connect integrated into your application.
Setting up a Dynamic Webhook
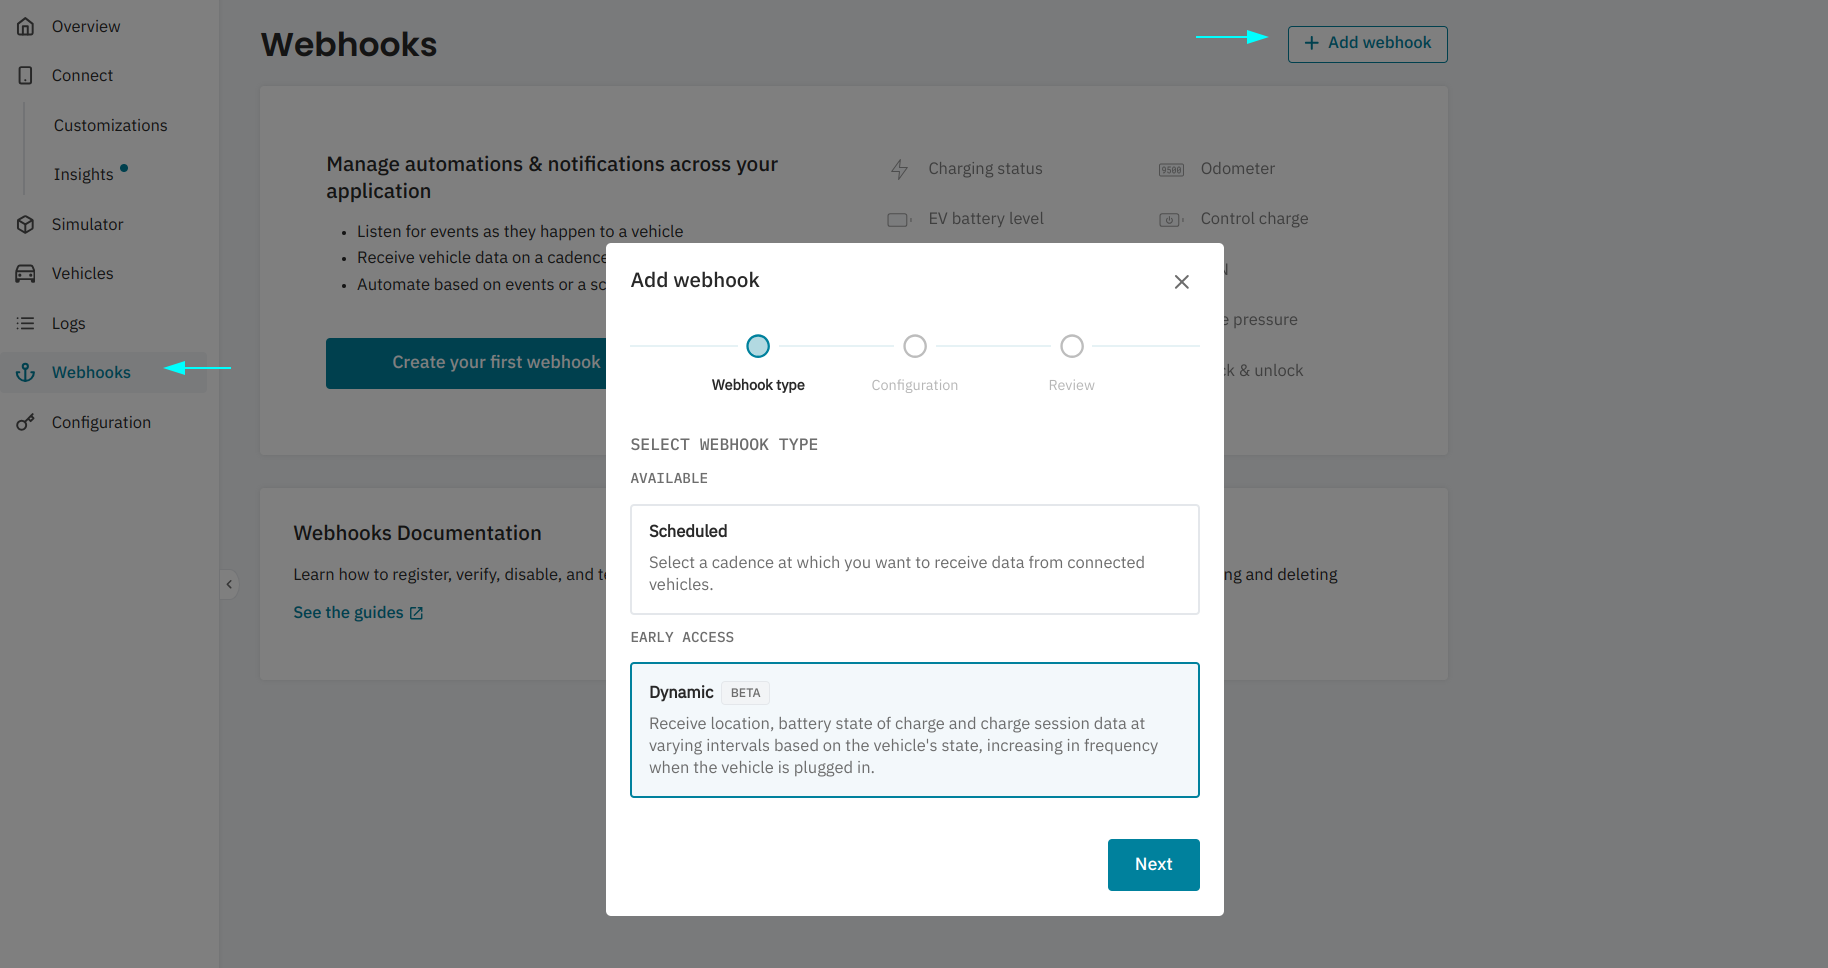
Navigate to Webhooks from the Smartcar Dashboard, select + Add webhook and select Dynamic from the Webhooks config wizard.
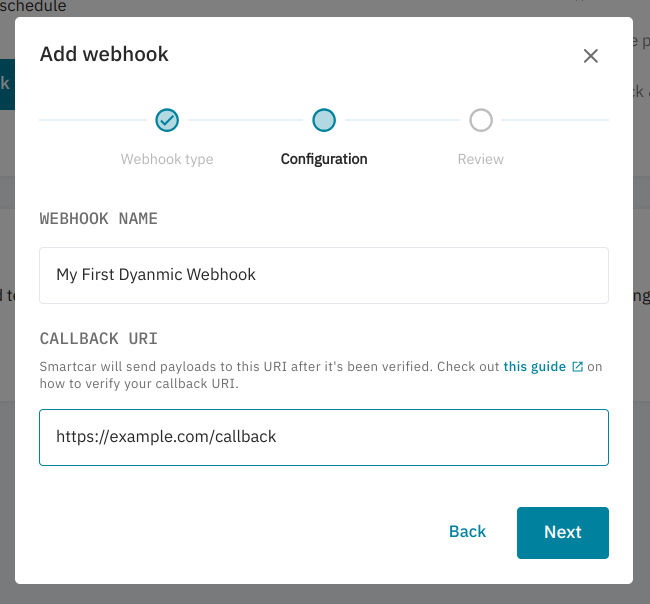
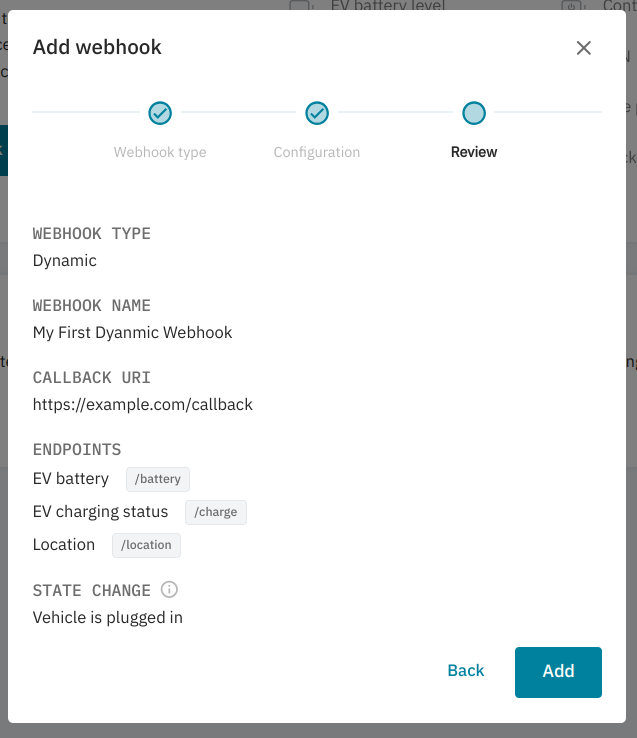
callback URI. Your callback URI is where Smartcar will send payloads from vehicles connected to your webhook. Click Next.


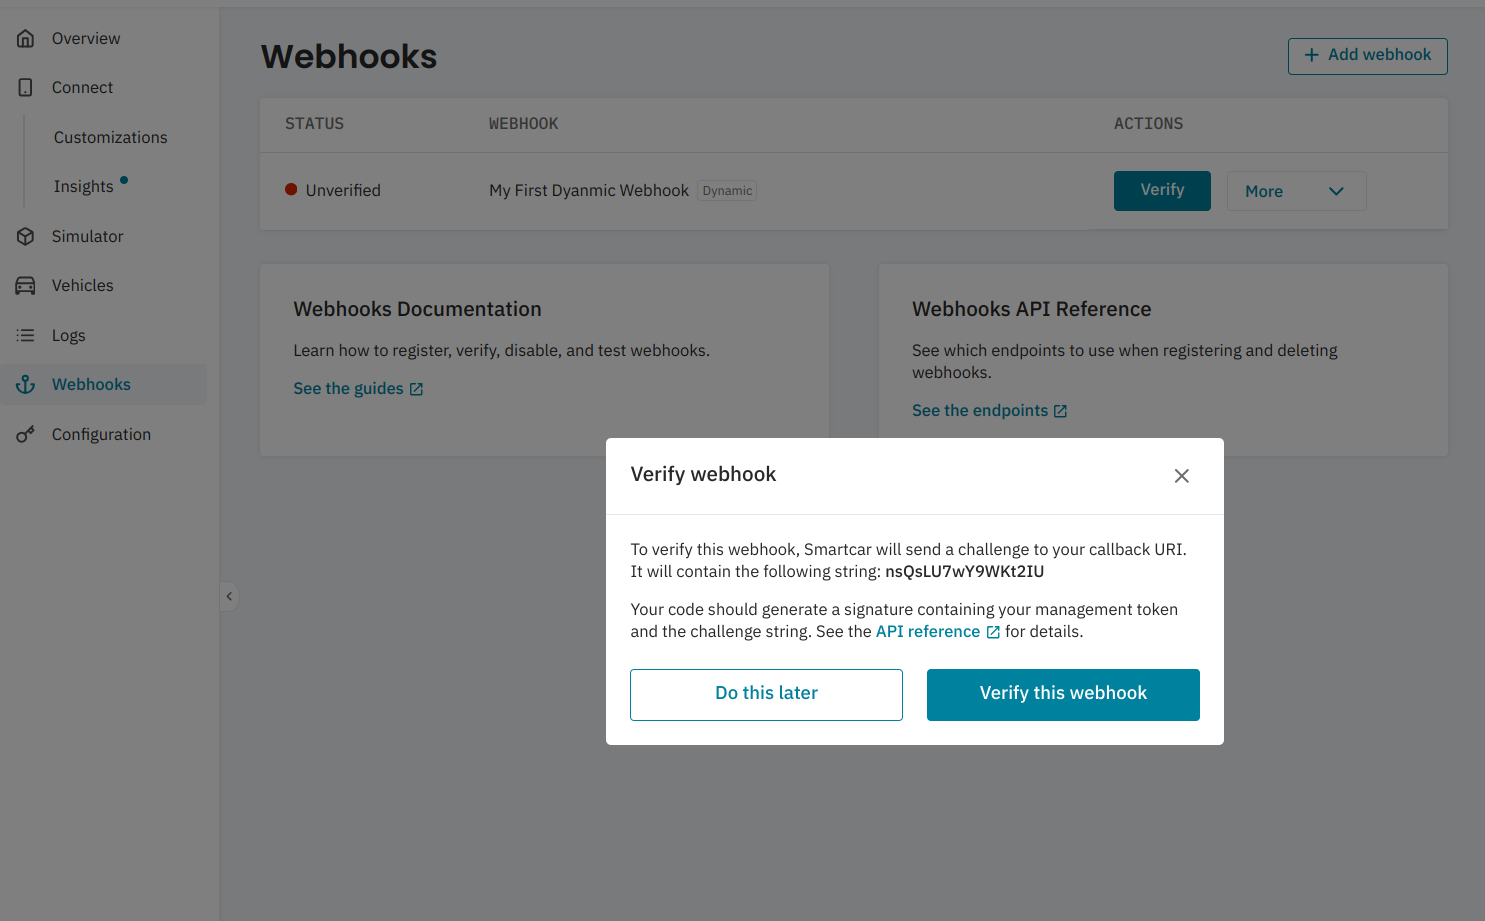
After adding your webhook, you’ll need to verify your callback URI. This is to ensure Smartcar is sending data to the correct place!

Subscribing vehicles to a webhook
Now you’ve got your webhook set up, you can subscribe vehicles to start getting data. If you haven’t done so already, please set up Connect for your application. After going through Connect and receiving your initialaccess_token, you’ll first want to hit the All Vehicles endpoint to fetch the Smartcar vehicle_ids of the authorized vehicles.
With your
access_token and webhook_id you can hit the Subscribe endpoint for each vehicle_id to start receiving data.
Example payload
dynamicWebhook.json
FAQs
How often will I get data?
How often will I get data?
By default Smartcar will deliver data every hour from the time a vehicle is subscribed. From that point on, once we detect the relevant state changes we’ll increase this to every 30 minutes, dropping back down to hourly once the state returns to what it was.Where more frequent data delivery is supported by an OEM, Smartcar will deliver data at those speeds. Please reach out to your Solutions Architect for more information.
Can I use the same callback URI for all my webhooks?
Can I use the same callback URI for all my webhooks?
Yes! You can distinguish between webhook types based on the
eventName field. Dynamic Webhooks will have eventName set to dynamic.What happens if my webhook destination goes down temporarily?
What happens if my webhook destination goes down temporarily?
Smartcar will attempt to resend payloads with an exponential backoff. Once your server is back online you’ll continue to receive data from the vehicles.
I've stopped receiving events
I've stopped receiving events
- Once a webhook is configured and a vehicle is subscribed, we’ll begin sending data to your Callback URI. We’ll expect a 2xx response to each. In the event that we don’t receive a 2xx response, we’ll retry 6 times with exponential backoff. If we continue not to receive a successful response, we’ll automatically disable your webhook.
- If you haven’t made any major changes to your callback URI, commonly our request payload may have hit the request size limit for you server.
What happens if a vehicle encounters an error? Will you retry?
What happens if a vehicle encounters an error? Will you retry?
Smartcar will attempt to get data from the vehicle with retries. However if we are unable to we’ll return the relevant error response in the payload for that vehicle.For example, if a vehicle owner changes the credentials to their connected services account we’ll return a CONNECT_SERVICES_ACCOUNT:AUTHENTICATION_FAILED error prompting you to have the vehicle owner go through Connect again to reauthenticate their vehicle.
How do I unsubscribe a vehicle from a webhook?
How do I unsubscribe a vehicle from a webhook?
To unsubscribe a vehicle you can hit the unsubscribe endpoint or disconnect the vehicle from your application.

