- Creating your webhook
- Verifying your callback URI
- Confirmation with a test payload
- Subscribing your first vehicle
Event Based Webhooks are an Enterprise feature. Please reach out to our team to get them enabled.
Prerequisites
For this tutorial it’s recommended to have the following in place:- To receive webhooks you’ll need to set up a callback URI on your server.
- To subscribe a vehicle you’ll want to have Connect set up.
Creating your first webhook
- Navigate to the Webhooks section of Dashboard and hit + Add Webhook.
- Next, name your webhook, enter in your callback URI, and select Event as the type.
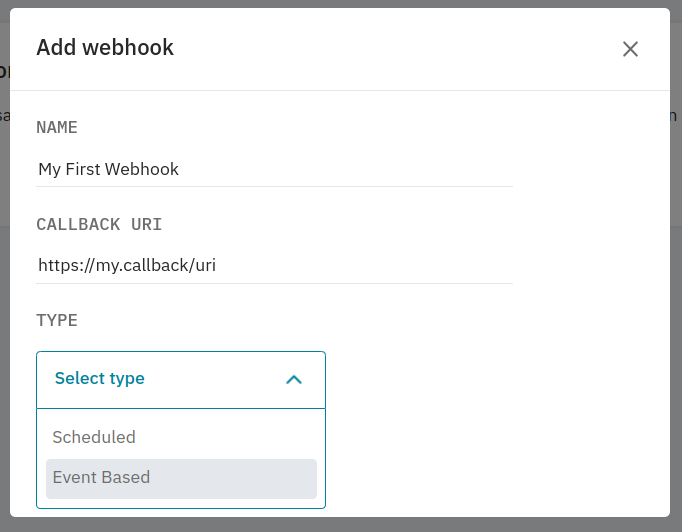
- After selecting the type, you’ll need to select which events you’d like to receive.
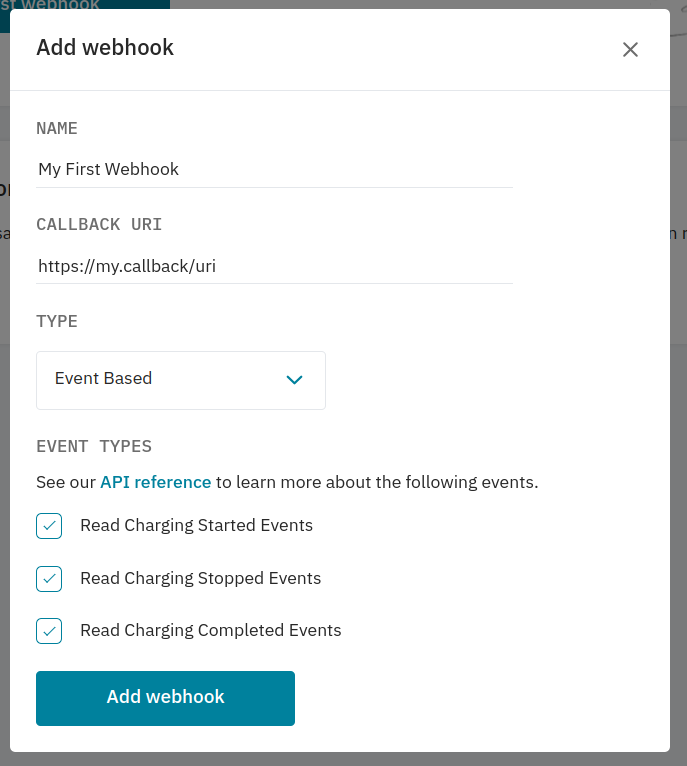
- Once you’re happy with the configuration, hit Add Webhook and move on to verifying your callback URI.
Verifying your callback URI
After adding your webhook, you’ll be prompted to verify it. After hitting Verify this webhook Smartcar will post a challenge request to your callback URI to ensure we’re sending payloads to the correct place.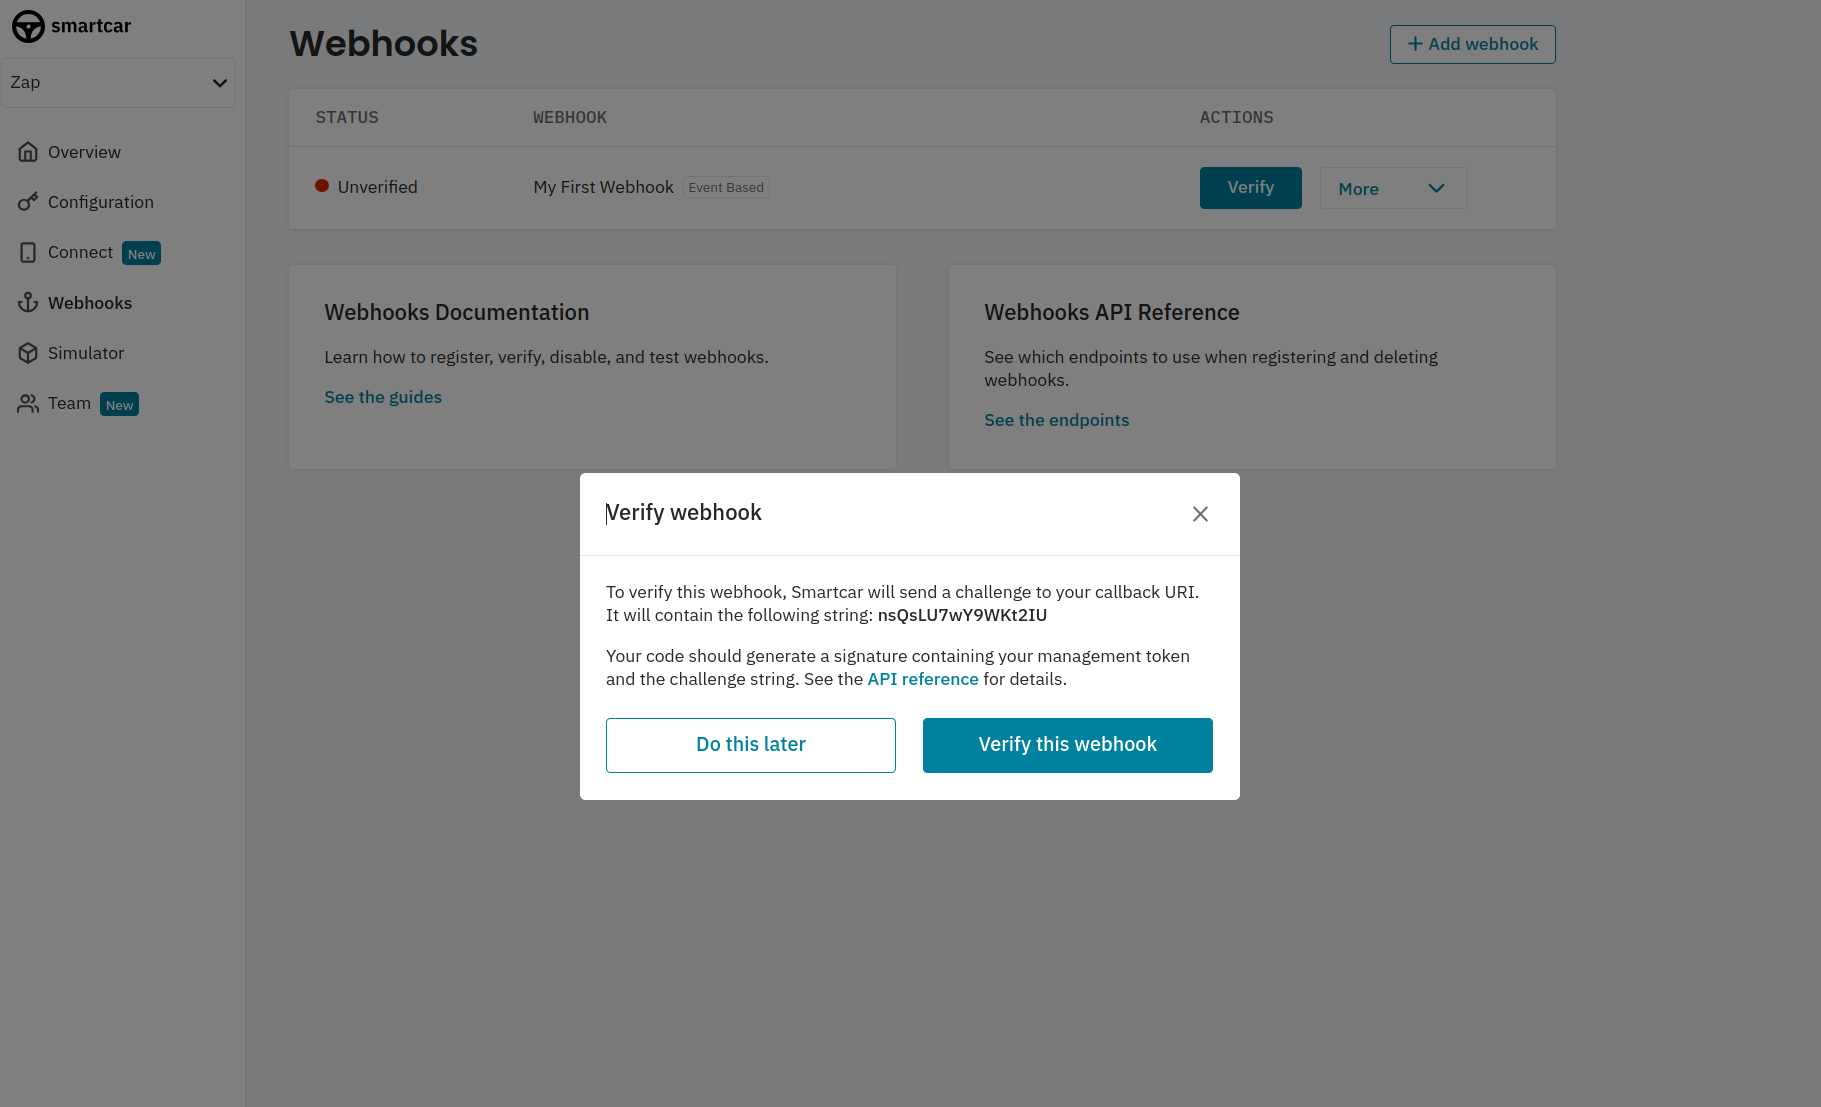
eventName will be verify
verificationRequest.body
payload.challenge with your APPLICATION_MANAGEMENT_TOKEN to create a SHA-256 based HMAC.
You can find your
APPLICATION_MANAGEMENT_TOKEN in the Configuration section of Dashboard for your application.challenge in your response body with a 2xx status code.
verificationResponse.body
Confirmation with a test payload
Once verified you can send a test payload to your callback URI. Payloads from vehicles will haveeventName set to eventBased.
Subscribing your first vehicle
Now you’ve got your webhook set up, you can subscribe vehicles to start getting data at your desired frequency. If you haven’t done so already, please set up the Connect for your application. After receiving your initialACCESS_TOKEN from the auth code exchange step for Connect,
you’ll first want to hit the List Connections endpoint to fetch the Smartcar
vehicle_ids of the authorized vehicles.
With your
ACCESS_TOKEN and WEBHOOK_ID you can hit the Subscribe
endpoint for each vehicle_id to start receiving data.
FAQs
Can I use a scheduled webhook to receive events?
Can I use a scheduled webhook to receive events?
No, you’ll need to set up a webhook for each type. However, you can receive multiple events per event based webhook.
Can I use the same callback URI for my webhooks?
Can I use the same callback URI for my webhooks?
Yes! You can distinguish between webhooks types based on the
eventName field - schedule or eventBased.I've stopped receiving events
I've stopped receiving events
- Once a webhook is configured, we’ll begin sending events to your Callback URI on the cadence that you’ve chosen. We’ll expect a 2xx response to each. In the event that we don’t receive a 2xx response, we’ll retry 5 times over the next 10 minutes. If we continue not to receive a successful response, we’ll automatically disable your webhook.
- Check that your server didn’t experience down time for more than 10 minutes recently resulting in 2xx responses not being sent back to Smartcar.
- If you haven’t made any major changes to your callback URI, commonly our request payload may have hit the request size limit for your server.
What's the latency from an event triggering and receiving it?
What's the latency from an event triggering and receiving it?
This depends on a variety of factors including the make of the vehicle as well as cell service where the vehicle is located at the time of the event.
You can check
payload.timestamp to see when the event was logged.