How to Detect and Process Charging Sessions with Webhooks
Learn how to use Smartcar webhooks to detect when a vehicle starts and ends charging, and how to process charging session data.
Smartcar webhooks make it easy to detect and process vehicle charging sessions in real time. This guide explains how to configure your webhook, handle charging events, and process charging session data in your backend.
1
Configure Your Webhook for Charging Events
In the Smartcar Dashboard, create or edit a webhook integration. Under Triggers, select the following events:
Charge.IsCharging
Charge.IsChargingCableConnected
These signals will act as triggers for detecting when a vehicle starts and stops charging and when it is plugged in or unplugged. Whenever these signals change, Smartcar will send a webhook event to your configured endpoint.
Next, you’ll configure your data. This is the information you want to receive in your webhook payload every time you receive a webhook event. Triggers are included by default, but you can also add additional signals to the data payload, such as:
Charge.StateOfCharge (included as a trigger)
Charge.ChargingCurrent (included as a trigger)
Charge.ActiveLimit
Charge.Amperage
Charge.Voltage
Charge.Wattage
Charge.EnergyAdded
Charge.TimeToComplete
TractionBattery.Range
TractionBattery.NominalCapacity
Location.PreciseLocation
These data signals will be delivered for every webhook event, allowing you to track the state of charge and other relevant metrics while the vehicle is charging.
Next, provide your webhook URL where Smartcar will send the events. Make sure your endpoint is publicly accessible and can handle POST requests. You can choose to auto enroll all your vehicles to this webhook or manually subscribe vehicles later (you can do this from the Dashboard). For this guide, select “don’t subscribe any vehicles”.
Now it is time to save and verify your webhook.
2
Validate Webhook Events
Smartcar will send a verification request to your endpoint, which you must respond to with a 200 OK status code to complete the setup (see Webhook Verification guide).
Once verified, you will start to receive vehicle data for the vehicles you have subscribed to this webhook. For this guide, we chose not to auto subscribe vehicles, so let’s head over to the Smartcar Dashboard to manually subscribe a vehicle to your webhook.
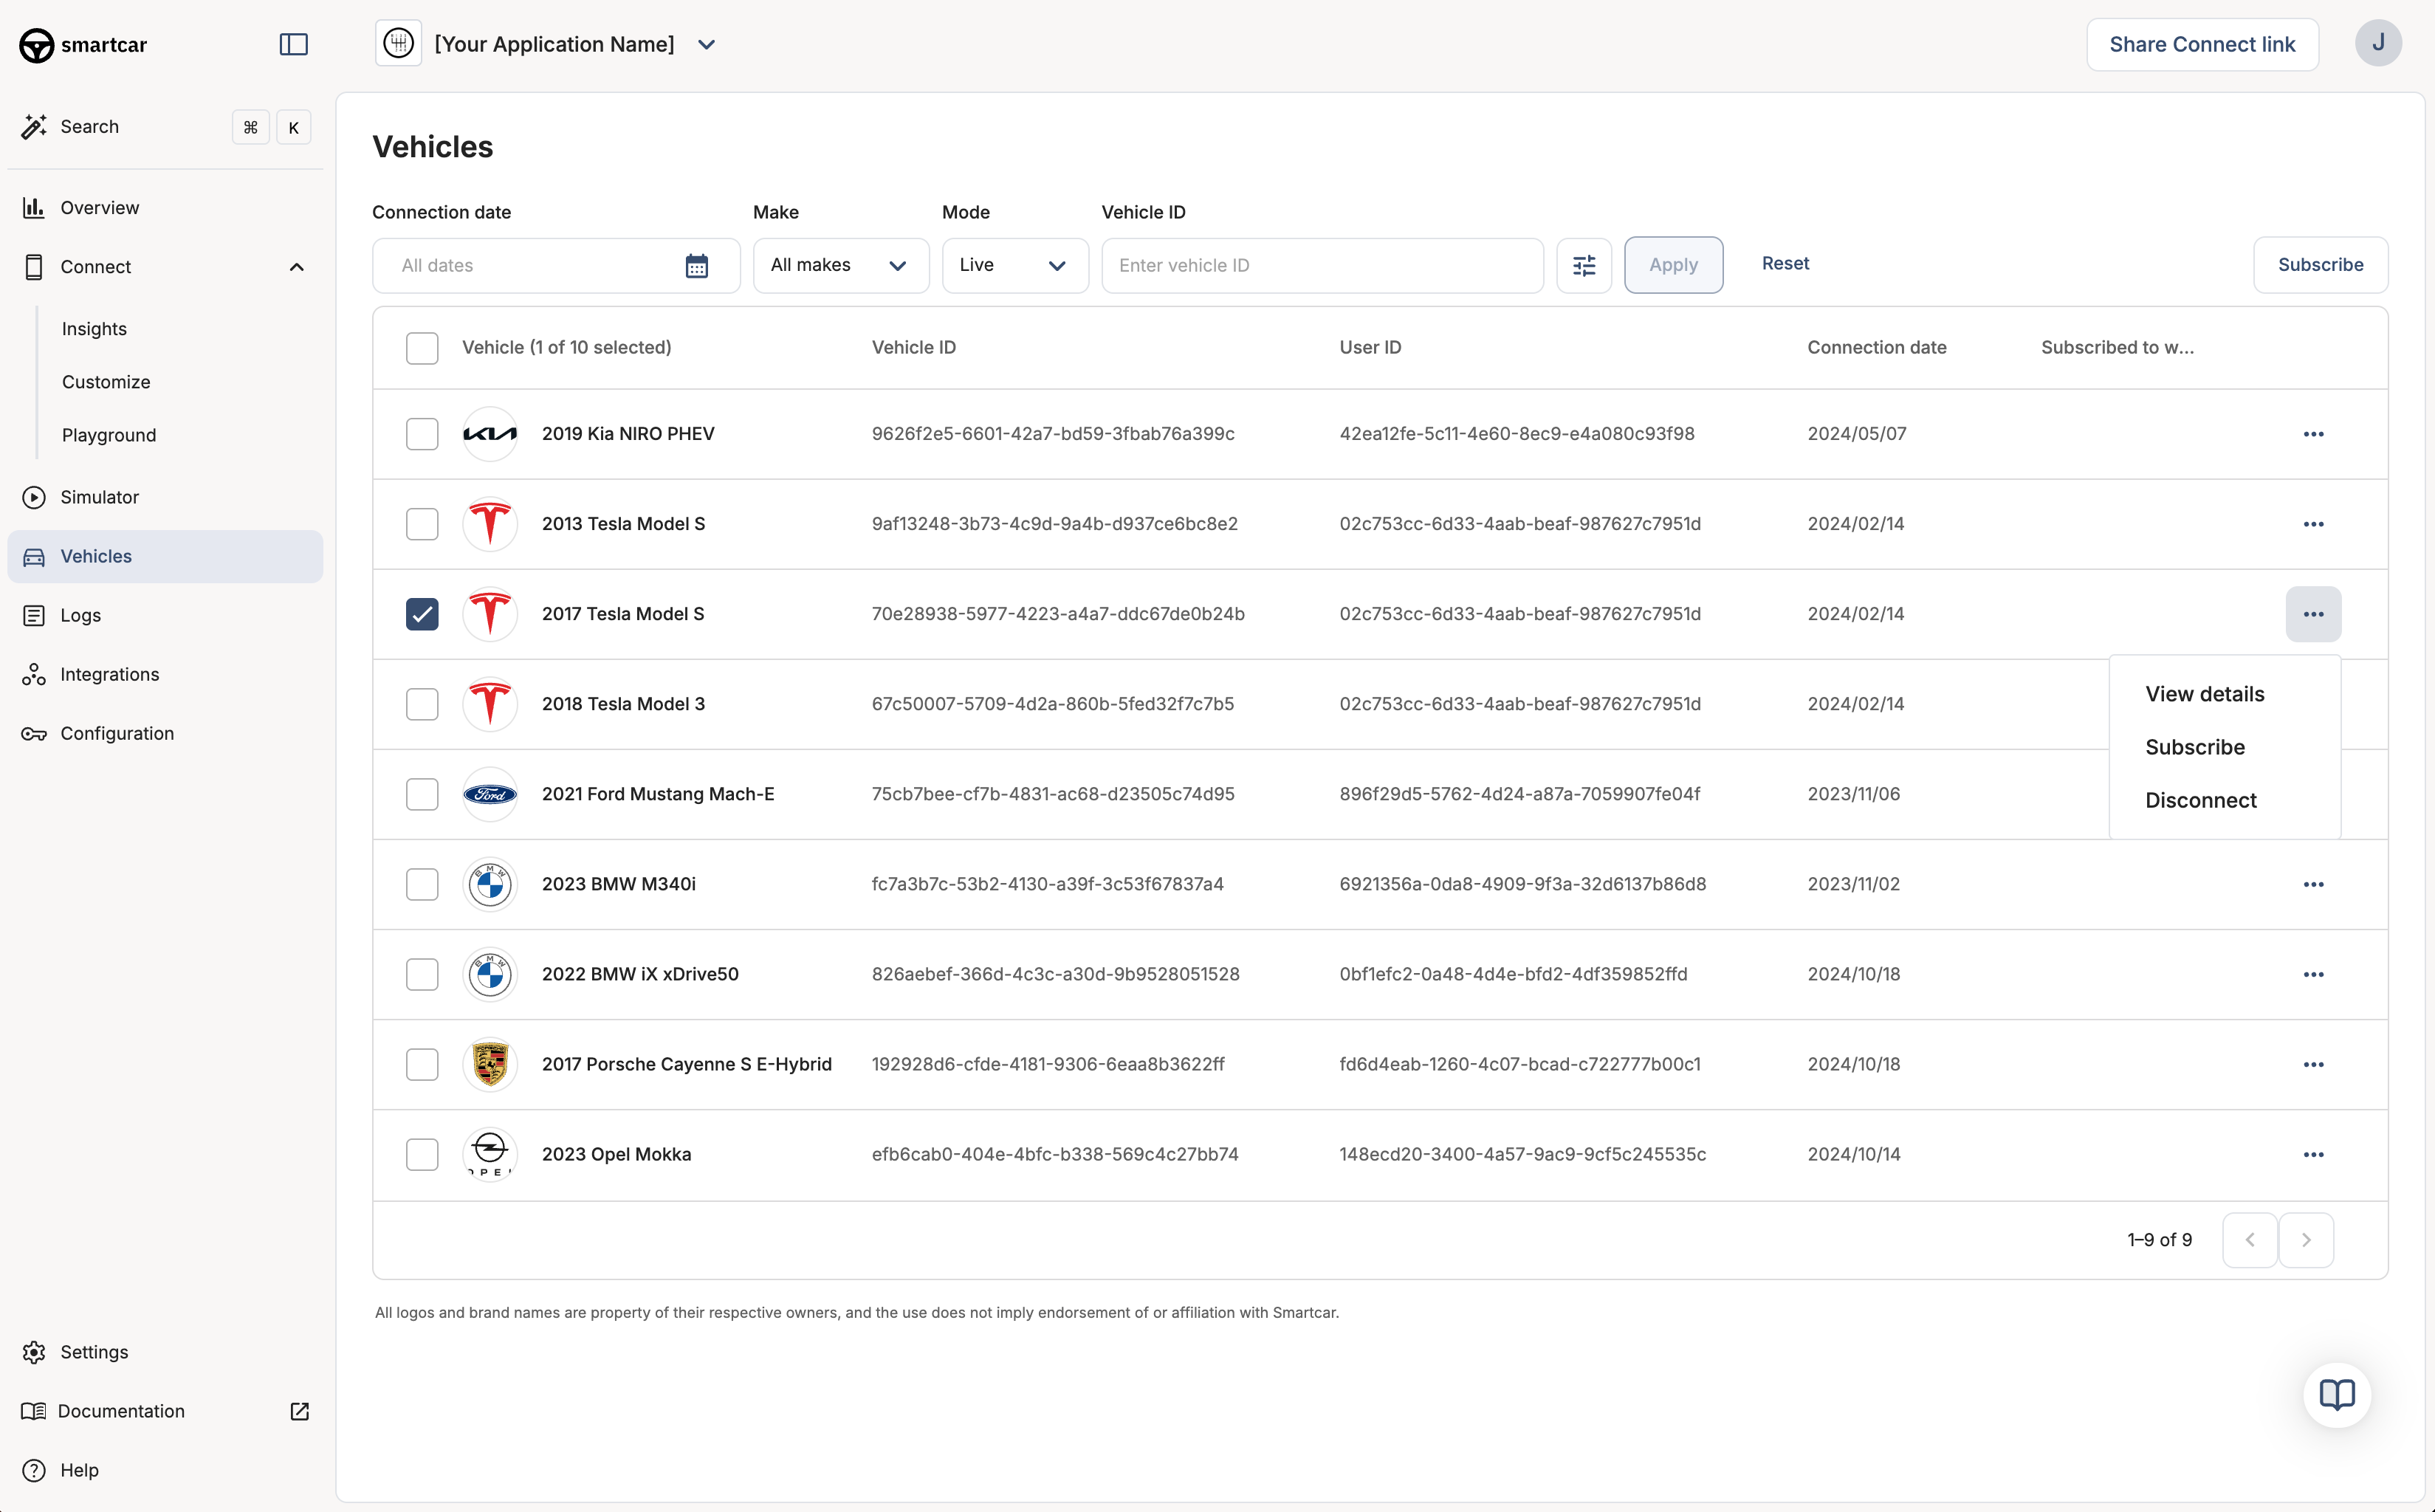
Select a vehicle from your list of connected vehicles and click on the three dots action menu to the right of the row and click subscribe. Select your newly created webhook from the options and click subscribe.
Subscribe a vehicle to a webhook in the Smartcar Dashboard
At this point, your webhook is fully configured to receive charging events from the subscribed vehicle. Now let’s handle the incoming webhook events in your backend.Every webhook will include an eventId and an eventType field. The eventType will indicate the type of event that occurred, such as VEHICLE_STATE or VEHICLE_ERROR.
Your handler should gracefully handle both event types. For VEHICLE_STATE events, you will receive the updated vehicle data. For VEHICLE_ERROR events, you may want to log the error.
For VEHICLE_STATE events, you will receive the data in a data property of the payload. There will also be an array of signals under a triggers property that caused the event to be sent. Lastly, you will also receive a meta property with additional context about the event, such as the webhook ID, name, delivery ID, delivery timestamp, etc.
When a vehicle starts charging, you will receive a webhook event with the eventType of VEHICLE_STATE and the Charge.IsCharging signal set to true. When the vehicle stops charging, you will receive another event with Charge.IsCharging set to false. You can use these events to track the start and end of each charging session.Example event payload: