> ## Documentation Index
> Fetch the complete documentation index at: https://smartcar.com/docs/llms.txt
> Use this file to discover all available pages before exploring further.
# How to Configure Permissions for Vehicle Data Collection
> Step-by-step guide to selecting signals, commands, and attributes in the Smartcar Dashboard and requesting the right permissions from vehicle owners.
To retrieve vehicle data through Smartcar, you must configure your application to request the correct permissions from vehicle owners. This guide walks you through the process using the Smartcar Dashboard.
Go to the [Smartcar Dashboard](https://dashboard.smartcar.com/configuration) and select your application. Navigate to the Configuration section and choose the Vehicle access tab.
Under the Signals, Commands, and Attributes tabs, select the specific vehicle data points and actions your application needs. Each selection corresponds to a permission that the vehicle owner must approve.
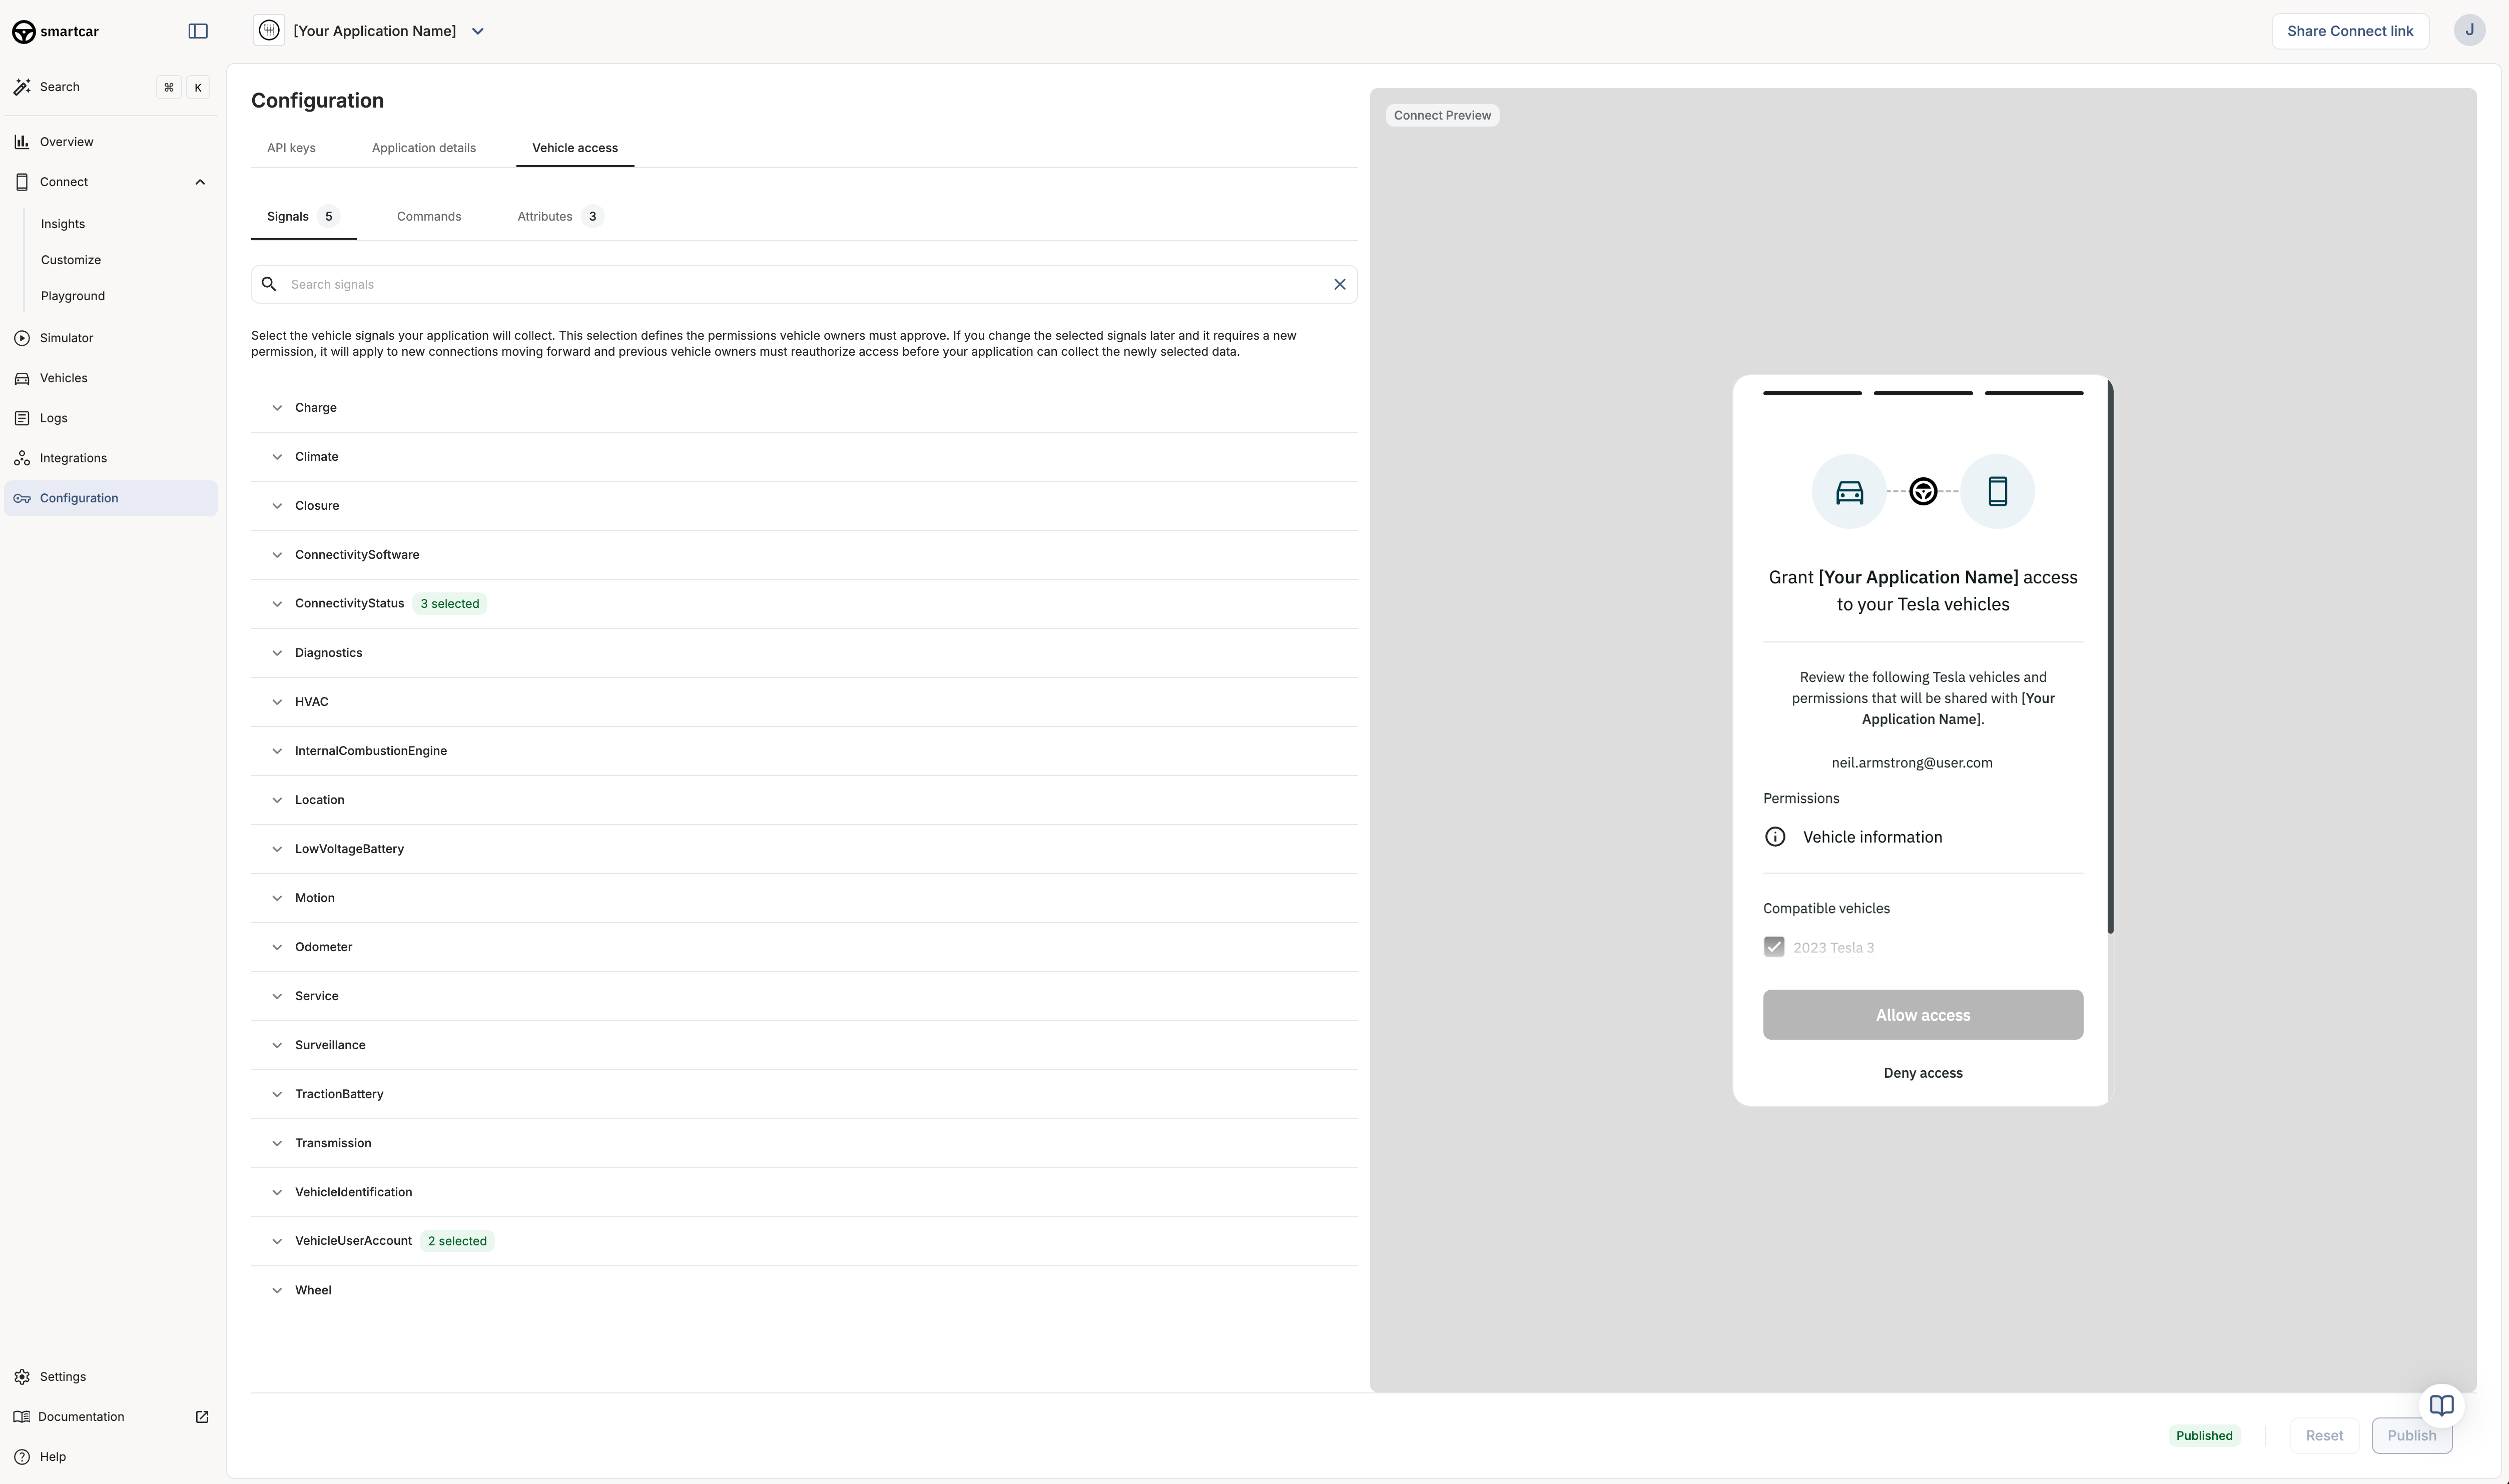
- Signals: Dynamic vehicle data (e.g., battery level, odometer, location).
- Commands: Actions your app can perform (e.g., lock/unlock, start charging).
- Attributes: Static vehicle info (e.g., make, model, year).
Only select the permissions your application truly needs. This improves user trust and increases the likelihood of successful connections.
As you select signals, commands, and attributes, the Connect Preview on the right updates to show what the vehicle owner will see when connecting their vehicle. This preview lists the permissions your app is requesting and the vehicles that will be connected.
Once you are satisfied with your selections, click Publish to save your configuration. Your application will now request these permissions from vehicle owners during the Smartcar Connect flow.
## Dynamic Permissions
If your application needs to access different permissions based on user actions or vehicle types, you can leverage the `scope` parameter in the Smartcar Connect URL to dynamically request permissions at runtime. This allows you to tailor the permissions based on the specific vehicle or user context.
Keep in mind that any permissions you pass via the `scope` parameter will override the permissions configured in the Smartcar Dashboard for that specific connection.
### Notes
* If you need to change permissions later, you can return to this configuration page and update your selections. Vehicle owners will need to reauthorize your application to grant any new permissions.
* The permissions you select here will determine the data and actions available to your application. Make sure to choose only what is necessary for your use case.
## Mark Permissions as Required or Optional
**Effective June 16th, 2026.** The behavior described in this section takes effect on June 16th, 2026.
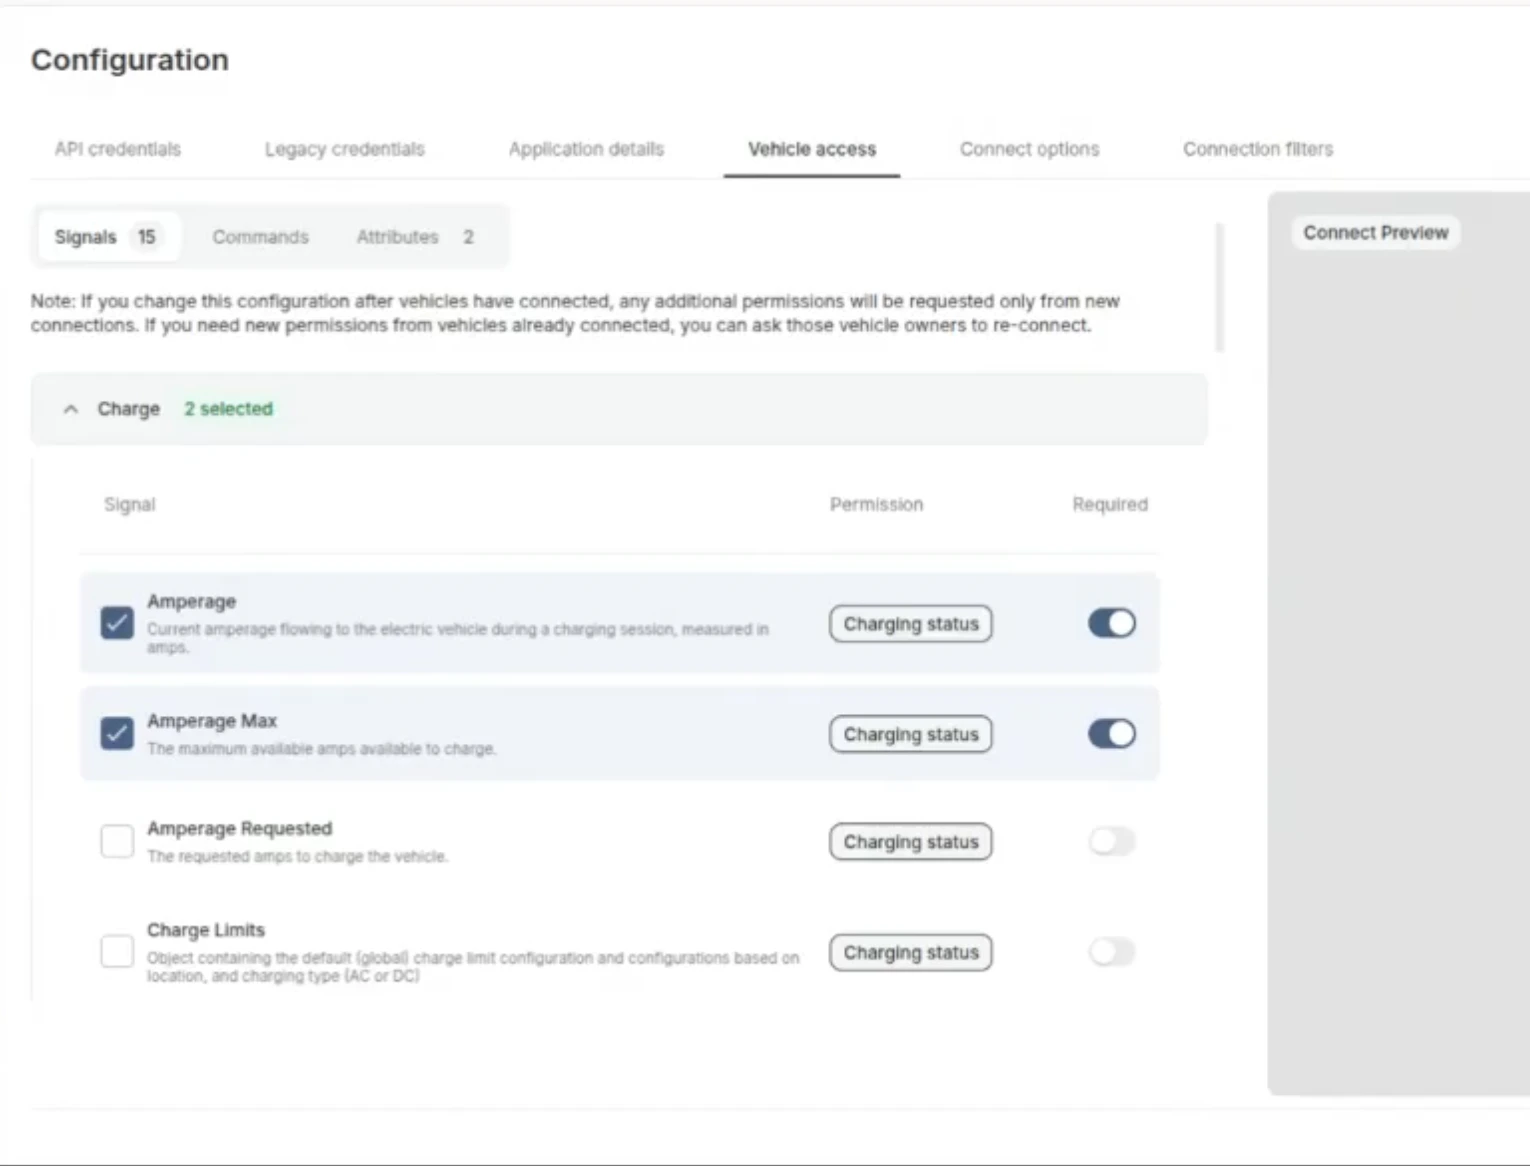
In the **Vehicle Access** tab, each signal has a **Required** toggle that controls how its permission appears to vehicle owners on the Connect grant screen.
* **Required** (toggle on): the permission appears checked and locked. The vehicle owner cannot uncheck it.
* **Optional** (toggle off): the permission appears checked by default, and the vehicle owner can uncheck it before connecting.
 At least one permission must remain selected for the owner to complete the connection.
Only mark a permission as required if it is absolutely necessary for your application to function. Leaving non-essential permissions optional gives vehicle owners more control and can improve your connection rate.
Marking a permission as required signals that your application needs it. It does not guarantee the vehicle supports it. To restrict which vehicles can connect by powertrain type, use [Connection Filters](/connect/advanced-config/connection-filters).
***
## What’s Next
* [How to Connect Vehicles](/getting-started/connect-vehicles)
* [How to Manage API Tokens](/getting-started/how-to/manage-api-tokens)
* [API Reference: Permissions](/api-reference/permissions)
At least one permission must remain selected for the owner to complete the connection.
Only mark a permission as required if it is absolutely necessary for your application to function. Leaving non-essential permissions optional gives vehicle owners more control and can improve your connection rate.
Marking a permission as required signals that your application needs it. It does not guarantee the vehicle supports it. To restrict which vehicles can connect by powertrain type, use [Connection Filters](/connect/advanced-config/connection-filters).
***
## What’s Next
* [How to Connect Vehicles](/getting-started/connect-vehicles)
* [How to Manage API Tokens](/getting-started/how-to/manage-api-tokens)
* [API Reference: Permissions](/api-reference/permissions)