> ## Documentation Index
> Fetch the complete documentation index at: https://smartcar.com/docs/llms.txt
> Use this file to discover all available pages before exploring further.
# Build the Connect URL
> Learn how to construct the Smartcar Connect URL to redirect users through the vehicle authorization flow.
For mobile or single-page web applications you can use one of our [frontend SDKs](/connect/connect-sdks), or for server-side rendered applications you can use one of
our [backend SDKs](/connect/connect-sdks). Using our SDKs makes it much easier to generate the Connect URL with the proper parameters.
You can configure default permissions for your application in the "Vehicle Access" tab of your application's Configuration page in the [Smartcar Dashboard](https://dashboard.smartcar.com). These settings will determine what permissions are requested during the Connect flow. Any `scope` parameters you specify in the Connect URL will override these dashboard settings.
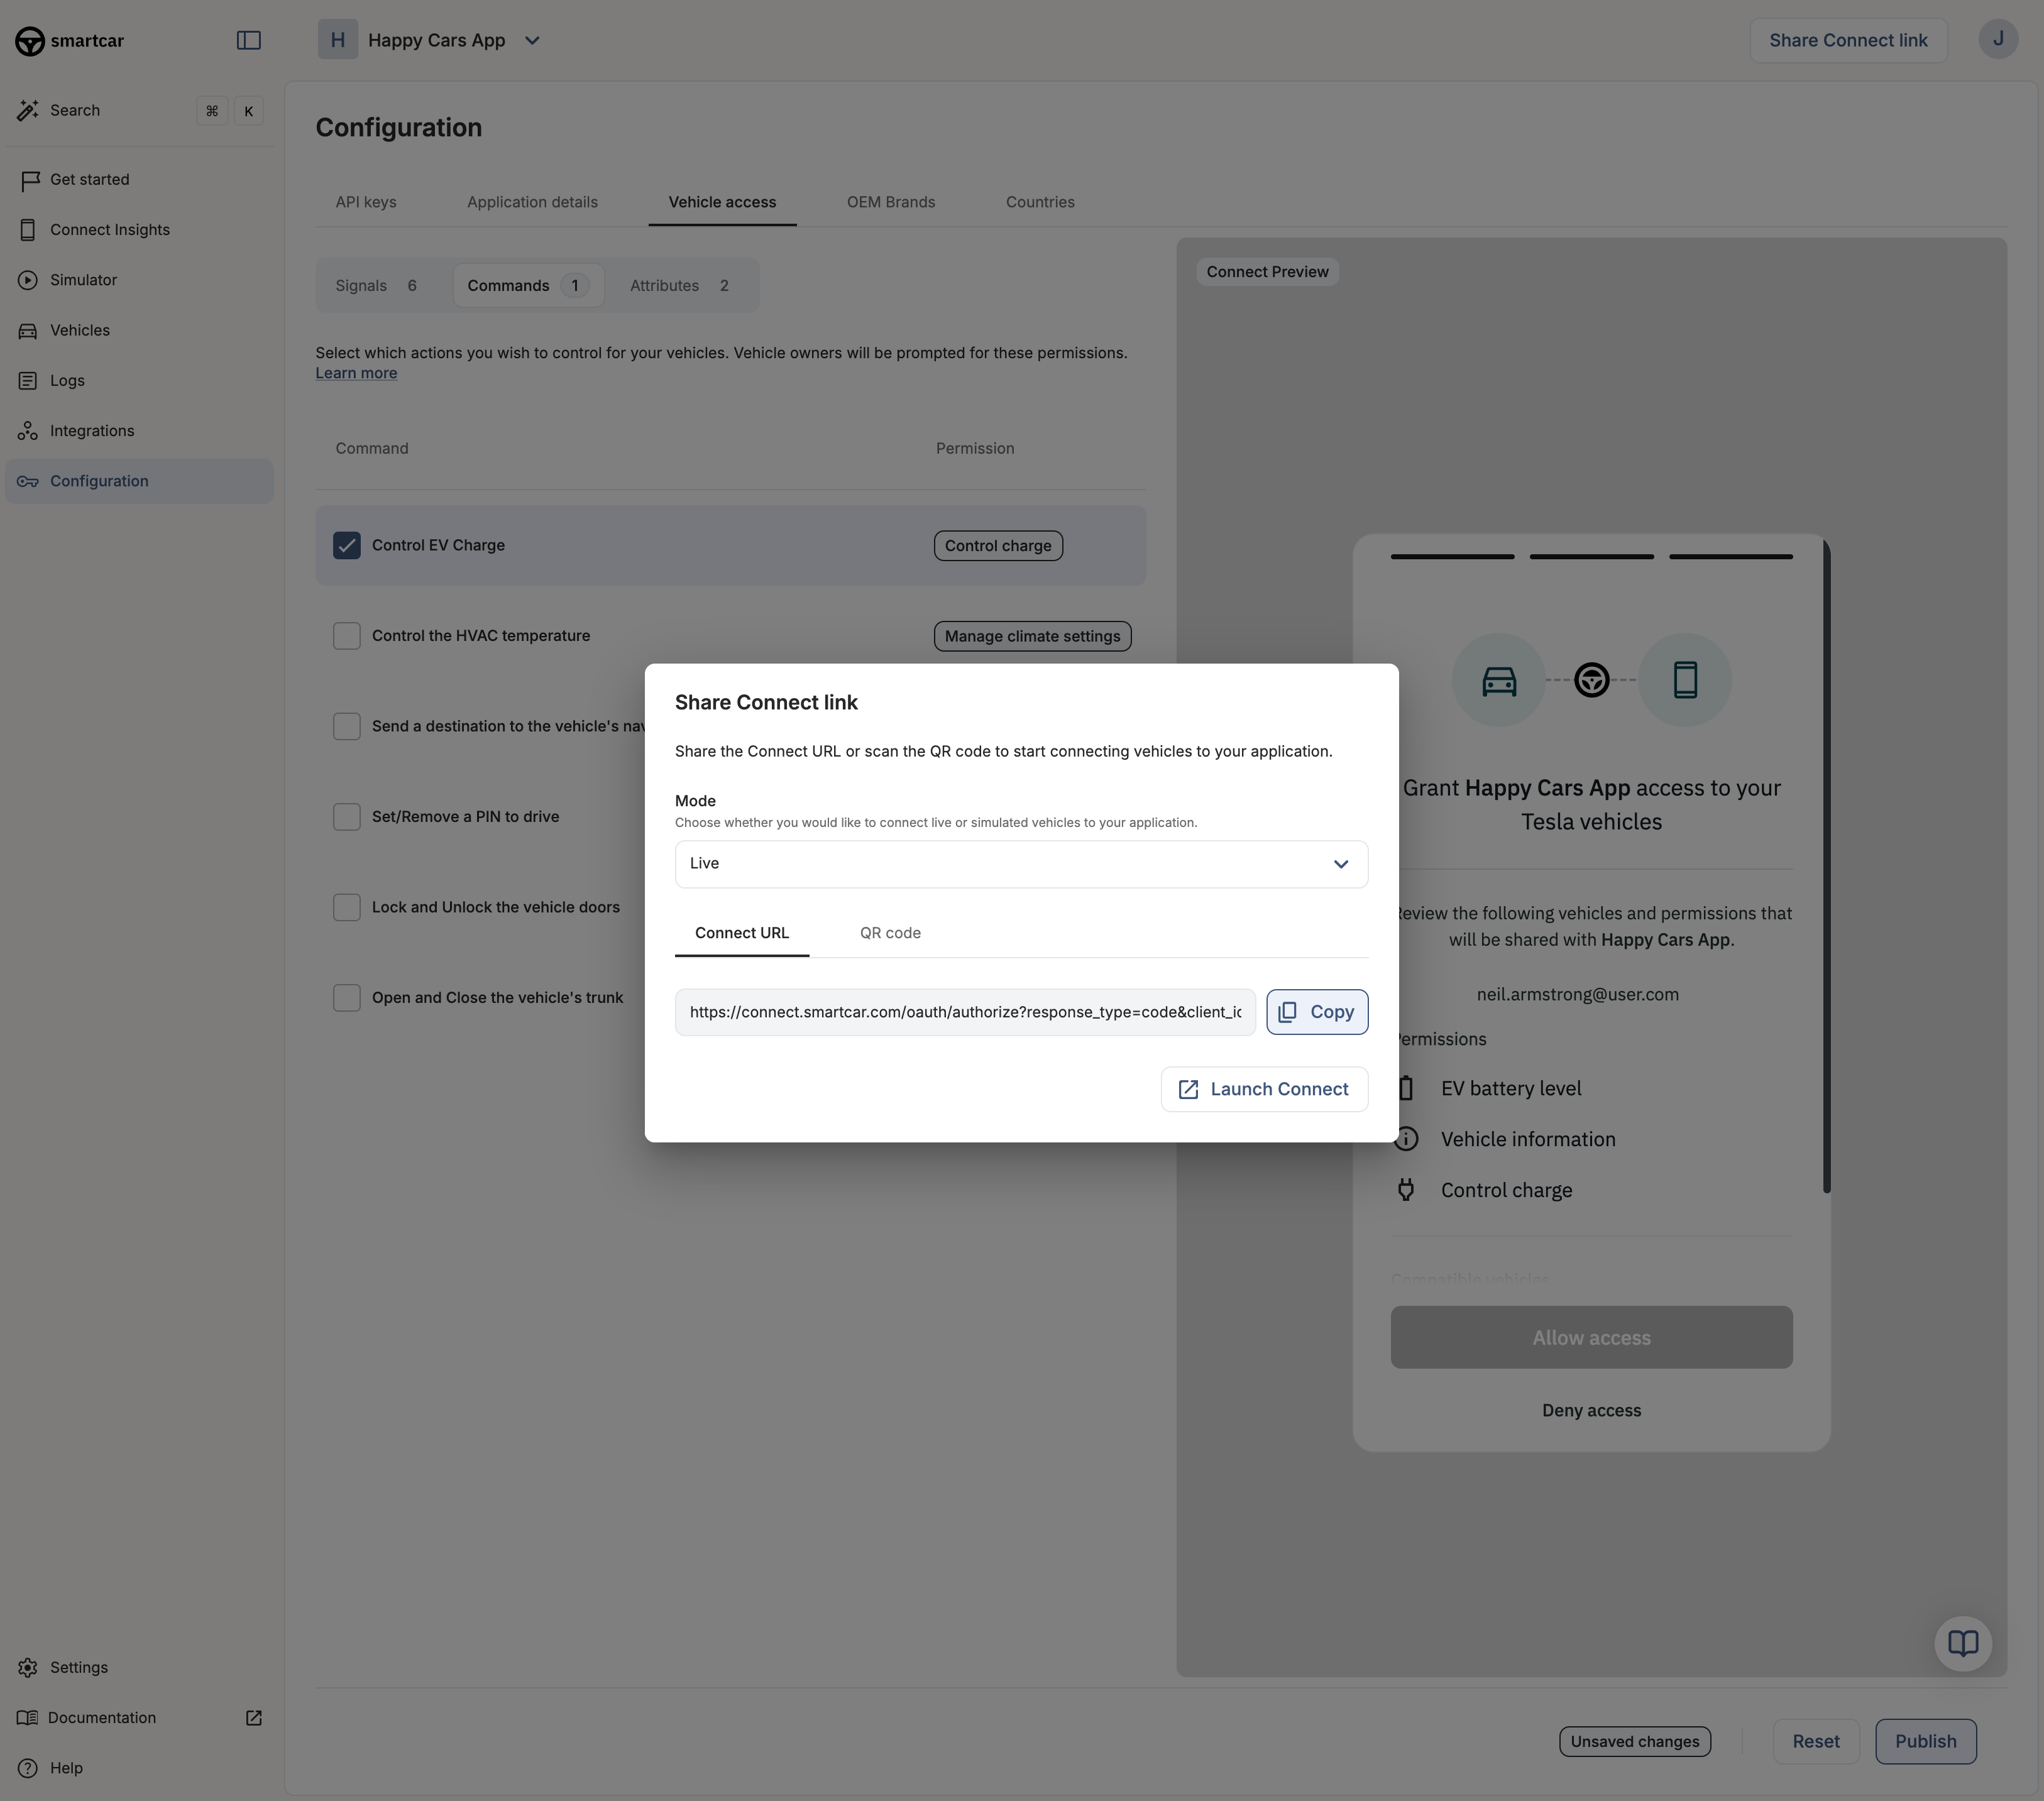
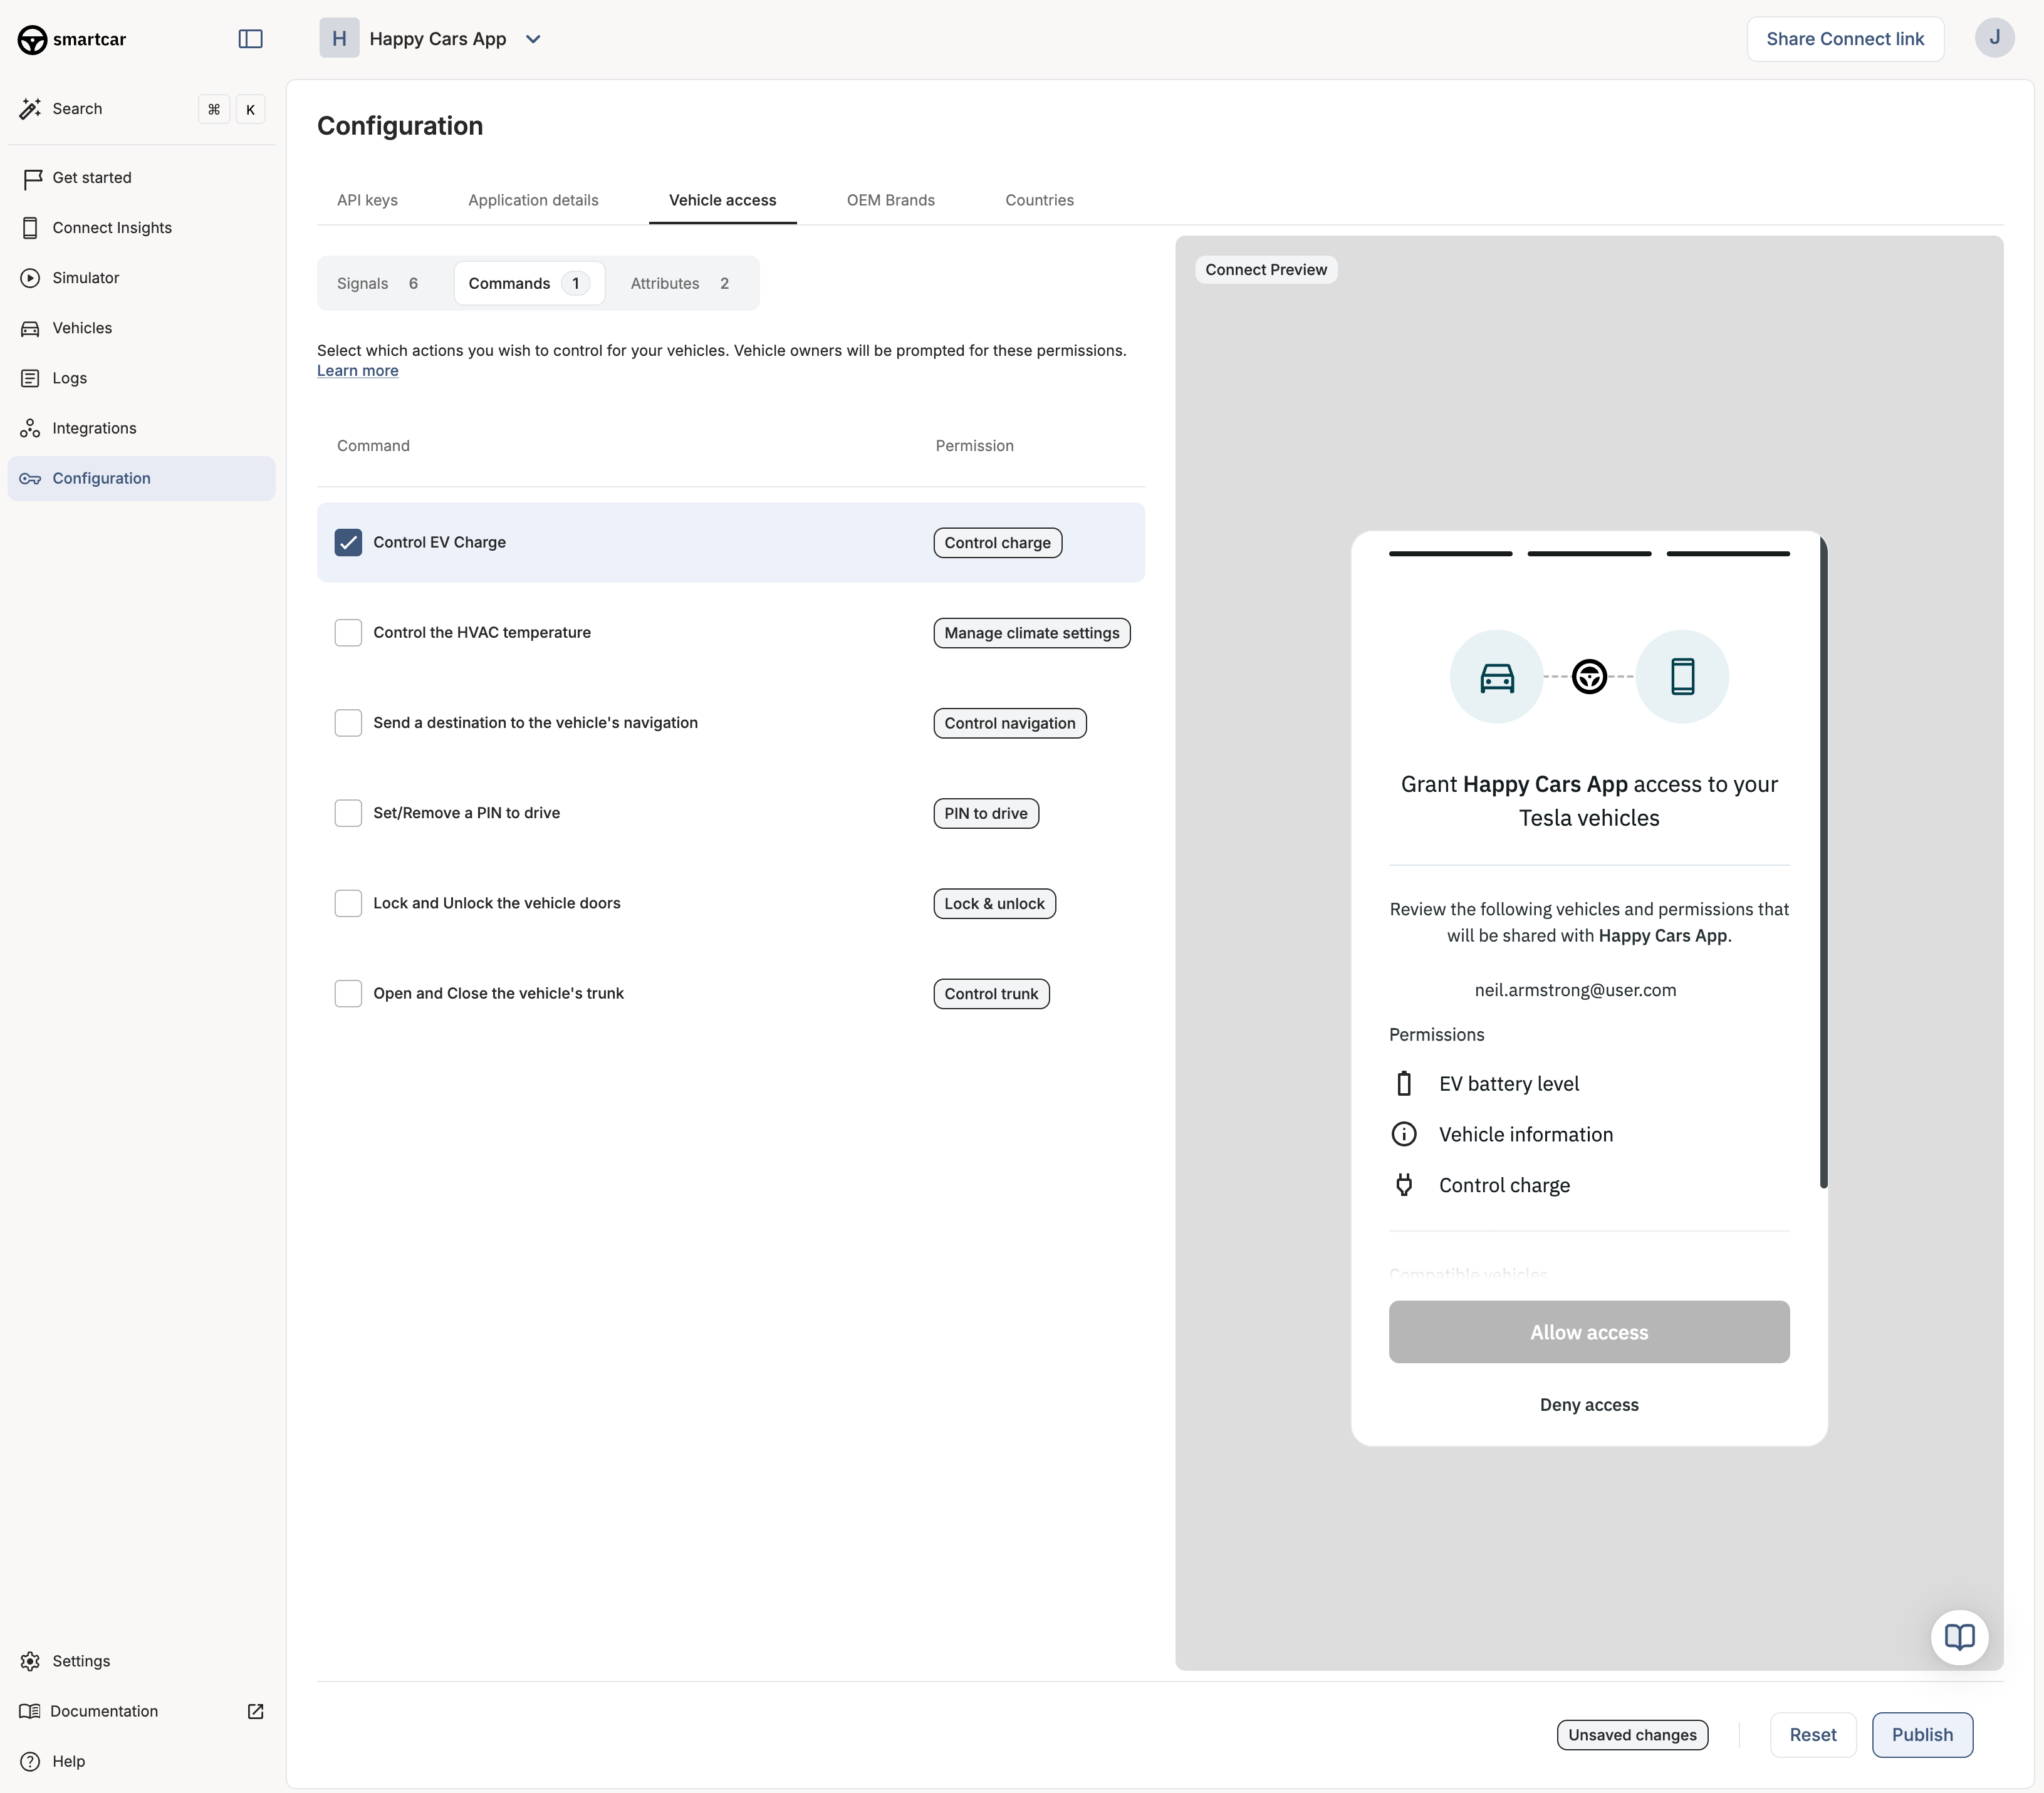 Once you have configured your application, you can get a pre-built Connect URL by clicking the "Share Connect Link" button at the top right in the Smartcar Dashboard.
 To build the Connect URL manually by overriding your dashboard settings, pass the following parameters:
Any parameters you specify in the Connect URL will override your dashboard settings.
Use the `required:` prefix on a permission in the `scope` parameter to lock it on the grant screen so the vehicle owner cannot uncheck it. Learn more in [Required permissions](/api-reference/permissions#required-permissions).
The application’s unique identifier. This is available on the credentials tab of the dashboard
The URI a user will be redirected to after authorization. This value must match one of the redirect URIs set in the credentials tab of the dashboard.
The first redirect URI you add to your application is automatically set as the default. If you do not specify a `redirect_uri` in your Connect URL, Smartcar will use this default URI. You can add multiple URIs and set any of them as the default in the Smartcar Dashboard.
This value must be set to `code` during the initial authentication. OAuth2 outlines multiple authorization types. Smartcar Connect utilizes the “Authorization Code” flow.
To reauthenticate a user after they have already connected a vehicle, you can set this value to the `vehicle_id` of a previously connected vehicle.
A space-separated list of permissions that your application is requesting access to. The valid permission names can be found in the [permissions](/api-reference/permissions) section.
**Effective June 16th, 2026.** The `required:` behavior described below takes effect on June 16th, 2026.
A permission is optional by default: it appears checked on the grant screen and the vehicle owner can uncheck it before connecting. Add the `required:` prefix to a permission name (e.g. `required:read_odometer`) to lock it on the grant screen so the owner cannot uncheck it. At least one permission must remain selected for the owner to complete the connection.
Only add the `required:` prefix to permissions that are absolutely necessary for your application to function. Avoid marking permissions as required if they are not necessary for your application to provide services to drivers.
The `required:` prefix controls only whether the owner can uncheck a permission. It does not filter which vehicles can connect, and it behaves the same in all regions. If a vehicle does not support a permission you requested, you receive a [VEHICLE\_NOT\_CAPABLE](/errors/api-errors/compatibility-errors#vehicle-not-capable) error when you call that endpoint, not during Connect. To restrict connections by powertrain type, use [Connection Filters](/connect/advanced-config/connection-filters).
If you don't specify a `scope` parameter, Smartcar will use the permissions configured in the "Vehicle Access" tab of your application's Configuration page in the Dashboard. Any `scope` parameters passed in the Connect URL will override those dashboard settings.
An optional value included as a query parameter in the `REDIRECT_URI` back to your application. This value is often used to identify a user and/or prevent cross-site request forgery
An optional value that sets the behavior of the approval dialog displayed to the user.
Defaults to `auto` and will only display the approval dialog if the user has not previously approved the scope.
Set this to `force` to ensure the approval dialog is always shown to the user even if they have previously approved the same scope.
Simulated mode lets you make requests to a vehicle created using the Vehicle Simulator to receive realistic responses from specific makes, models, years, and various states of the vehicle.
Should the selected simulator not support the desired endpoint randomized data will be returned instead.
Live mode should be used when connecting to a real vehicle.
Allows users to bypass the Brand Selector screen. Valid `makes` can be found in the [makes](/api-reference/makes) section on API reference.
The `single_select_vin` parameter takes precedence over this parameter.
Sets the vehicle selection behavior of the grant dialog. If set to true, then the user is only allowed to select a single vehicle. Please refer to the Single Select section for more information.
This parameter is only available in the Custom Plan.
Sets the behavior of the permissions screen in Smartcar Connect.
When using `single_select_vin`, you need to pass in the VIN (Vehicle Identification Number) of a specific vehicle into the `single_select_vin` parameter.
Additionally, you need to set the `single_select` parameter to `true`.
Smartcar Connect will then let the user authorize **only the vehicle with that specific VIN**.
The `single_select_vin` parameter takes precedence over the `make` parameter.
Please refer to the Single Select section for more information.
This parameter is only available in the Custom Plan.
A space separated list of feature flags in the form `{flag}:{value}`.
The two-character ISO country code of the country that your user is located in. You can set the default country for Connect on Dashboard
If no flag is passed or set as default on Dashboard, Smartcar will use the devices IP to set an appropriate country.
This flag determines what brands are listed on the Brand Selector screen in Connect e.g. Renault is available in Europe, but not the US.
Specify a unique identifier for the vehicle owner to track and aggregate analytics across Connect sessions for each vehicle owner on Dashboard.
Note: Use the `state` parameter in order to identify the user at your callback URI when receiving an authorization or error code after the user exits the Connect flow.
```http Example Connect URL theme={null}
HTTP/1.1 302 Found
Location: https://connect.smartcar.com/oauth/authorize?
response_type=code
&client_id=8229df9f-91a0-4ff0-a1ae-a1f38ee24d07
&scope=read_odometer read_vehicle_info read_location
&redirect_uri=https://example.com/home
&state=0facda3319
```
To build the Connect URL manually by overriding your dashboard settings, pass the following parameters:
Any parameters you specify in the Connect URL will override your dashboard settings.
Use the `required:` prefix on a permission in the `scope` parameter to lock it on the grant screen so the vehicle owner cannot uncheck it. Learn more in [Required permissions](/api-reference/permissions#required-permissions).
The application’s unique identifier. This is available on the credentials tab of the dashboard
The URI a user will be redirected to after authorization. This value must match one of the redirect URIs set in the credentials tab of the dashboard.
The first redirect URI you add to your application is automatically set as the default. If you do not specify a `redirect_uri` in your Connect URL, Smartcar will use this default URI. You can add multiple URIs and set any of them as the default in the Smartcar Dashboard.
This value must be set to `code` during the initial authentication. OAuth2 outlines multiple authorization types. Smartcar Connect utilizes the “Authorization Code” flow.
To reauthenticate a user after they have already connected a vehicle, you can set this value to the `vehicle_id` of a previously connected vehicle.
A space-separated list of permissions that your application is requesting access to. The valid permission names can be found in the [permissions](/api-reference/permissions) section.
**Effective June 16th, 2026.** The `required:` behavior described below takes effect on June 16th, 2026.
A permission is optional by default: it appears checked on the grant screen and the vehicle owner can uncheck it before connecting. Add the `required:` prefix to a permission name (e.g. `required:read_odometer`) to lock it on the grant screen so the owner cannot uncheck it. At least one permission must remain selected for the owner to complete the connection.
Only add the `required:` prefix to permissions that are absolutely necessary for your application to function. Avoid marking permissions as required if they are not necessary for your application to provide services to drivers.
The `required:` prefix controls only whether the owner can uncheck a permission. It does not filter which vehicles can connect, and it behaves the same in all regions. If a vehicle does not support a permission you requested, you receive a [VEHICLE\_NOT\_CAPABLE](/errors/api-errors/compatibility-errors#vehicle-not-capable) error when you call that endpoint, not during Connect. To restrict connections by powertrain type, use [Connection Filters](/connect/advanced-config/connection-filters).
If you don't specify a `scope` parameter, Smartcar will use the permissions configured in the "Vehicle Access" tab of your application's Configuration page in the Dashboard. Any `scope` parameters passed in the Connect URL will override those dashboard settings.
An optional value included as a query parameter in the `REDIRECT_URI` back to your application. This value is often used to identify a user and/or prevent cross-site request forgery
An optional value that sets the behavior of the approval dialog displayed to the user.
Defaults to `auto` and will only display the approval dialog if the user has not previously approved the scope.
Set this to `force` to ensure the approval dialog is always shown to the user even if they have previously approved the same scope.
Simulated mode lets you make requests to a vehicle created using the Vehicle Simulator to receive realistic responses from specific makes, models, years, and various states of the vehicle.
Should the selected simulator not support the desired endpoint randomized data will be returned instead.
Live mode should be used when connecting to a real vehicle.
Allows users to bypass the Brand Selector screen. Valid `makes` can be found in the [makes](/api-reference/makes) section on API reference.
The `single_select_vin` parameter takes precedence over this parameter.
Sets the vehicle selection behavior of the grant dialog. If set to true, then the user is only allowed to select a single vehicle. Please refer to the Single Select section for more information.
This parameter is only available in the Custom Plan.
Sets the behavior of the permissions screen in Smartcar Connect.
When using `single_select_vin`, you need to pass in the VIN (Vehicle Identification Number) of a specific vehicle into the `single_select_vin` parameter.
Additionally, you need to set the `single_select` parameter to `true`.
Smartcar Connect will then let the user authorize **only the vehicle with that specific VIN**.
The `single_select_vin` parameter takes precedence over the `make` parameter.
Please refer to the Single Select section for more information.
This parameter is only available in the Custom Plan.
A space separated list of feature flags in the form `{flag}:{value}`.
The two-character ISO country code of the country that your user is located in. You can set the default country for Connect on Dashboard
If no flag is passed or set as default on Dashboard, Smartcar will use the devices IP to set an appropriate country.
This flag determines what brands are listed on the Brand Selector screen in Connect e.g. Renault is available in Europe, but not the US.
Specify a unique identifier for the vehicle owner to track and aggregate analytics across Connect sessions for each vehicle owner on Dashboard.
Note: Use the `state` parameter in order to identify the user at your callback URI when receiving an authorization or error code after the user exits the Connect flow.
```http Example Connect URL theme={null}
HTTP/1.1 302 Found
Location: https://connect.smartcar.com/oauth/authorize?
response_type=code
&client_id=8229df9f-91a0-4ff0-a1ae-a1f38ee24d07
&scope=read_odometer read_vehicle_info read_location
&redirect_uri=https://example.com/home
&state=0facda3319
```